 Taylor and Marie came to visit alot as the cool breeze from the shop fans made it right comfy here in the Swamp.
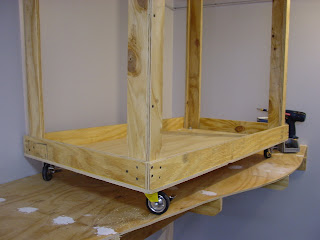
 I went to Ace Hardward and bought the flat washers and fine threaded nuts to put the castors on the bottom of the gurney. Some people call these moving layout segments "battleships" or "mobile modules" but I still like gurney. The new castors roll very nicely.
 The legs will be made from ripped 3/4" plywood stock cut to 3" and 2" board widths. One 3" to one 2" per leg in L-girder fashion. I do the work on my 8 foot heavy workbench. One thing that I believe all layout builders should do is make sure they save room for a work area. Many layouts I work on are short of space and that makes for sloppy and dangerous work. I have two large rooms, a shop and a two car garage as well as the back yard to work in so we're good.
 I brace up the 2" board then glue and screw the 2" board along the 3" board making an L shape beam.
 Using the new L to support the other board, I repeat the process.
 Once the four legs were built, I screwed them into the bottom box.
 I used a level to make sure they were straight and did the work up on the benchwork so that I wasn't bending over or sitting on the hard floor. Looks good!
 I dropped the assembly to the floor and positioned it under the layout.
 A fan keeps the air circulating. I have not installed the air conditioning yet, but really its not that warm down here. The fan keeps it cool while its 99 degrees outside here in Georgia.
 The legs were checked for position and then the whole assembly was carefully leveled. Once level in every possible way, I anchored the legs onto the top benchwork with 1 5/8" drywall screws. She's solid!
 I rolled the gurney around and she moves great! The heavy base keeps her very stable.
 The gurney can be shoved into the back of the layout room to make way for work on the layout area behind the gurney. Its a little tight, though.
 This one corner needs to go on a diet. It's not a problem since this buildge is a scenic area and not critical to the main line.
 I made a note to myself to cut it back.
 I rolled the gurney out of the room and into the area that will be the crew lounge. Moves great!
 The ultimate test was to see if I could get it into the shop. I was able to get it inside fine!
 I can even turn it 360 degrees. This way I can do detail work on this section in the comfort of the shop where all my tools are, and in a climate controlled environment. I'm also next to the airbrush.
Oops! Scratch that idea. I could get it in to the shop because of the angled cut on one side. However, it wouldn't come out! This could be a pain. I had to tip it over to get it out.
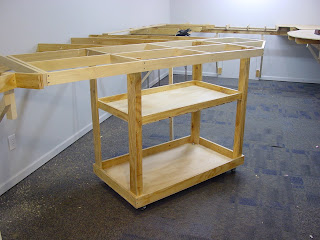
 The final step was to build another shelf in the gurney. This shelf will hold the DCC system when the gurney is on tour as well as tools and models. It is much more shallow than the bottom shelf.
 There! All done! Now my rolling display can go anywhere.
There is still just a little more benchwork to do, and I still don't have the right sanding belt, so I'm off to the Home Depot again. I may finish more of the benchwork tonight.


No comments:
Post a Comment
Thanks for your comment!