(Blowing the dust off the computer).....tap tap...testing one two three...testing...anyone out there? Wow its been a long time! So much has changed. I'm posting today to let you know that I have finally moved back South, built a new house, and I have a big basement. It's time to build a major layout.
After some deliberation, I'm going to build a new On30 Hebard Cypress Company in the Okefenokee Swamp! Because I'm still finishing the basement we are going to do it in two stages. First will be a pit operated portable layout. Then as we get the room ready these sections which will be highly detailed will be mounted on the walls for a large layout.
Please follow along on The Model Railroader's Notebook! Oh...and tell a friend!
Thursday, November 22, 2018
Sunday, October 3, 2010
End of the Line #2
The Okefenokee Swamp Layout was cut out of the room today. A sad event and a I wouldn't let the guys take pictures.
The good news is all the lumber has been moved to Steve's house in order to construct the B&O layout, so that is good news.
The battleship is going to Utah!
The good news is all the lumber has been moved to Steve's house in order to construct the B&O layout, so that is good news.
The battleship is going to Utah!
Saturday, September 18, 2010
End of the Line
It's official. I'm moving my family from Atlanta to Utah. I've taken a new job in Salt Lake City and will be relocating soon.
Please don't be surprised if I don't blog between now and December, but look forward to new things happening in January!
The swamp layout will be dismantled and the plans will be filed away for some other time. I will continue to build structures and rolling stock for a future layout. Maybe a sectional one!
Friday, March 26, 2010
#011 01 Dr. Bank's Office - Making Good Progress - Rafters
I need to finish the doctor's office so the good doctor can see me. Still coughing, still sick. Saw the real doctor again for the third time. More pills. More pain...said go home and rest. So I'm building models and coughing.

We working on rafters today. First we'll cut out the rafter diagram and make a jig like Darryl Huffman's excellent video directs us to do.
 Once it is duct out we'll flatten it and mount it to a base.
 Using a square of .040 sheet styrene we'll build a jig for the rafters.
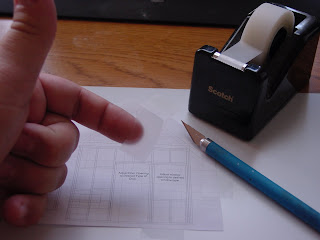 I carefully tape the diagram to the sheet of plastic trying not to put tape all the way around the drawing, but still trying to keep it flat.

Using a long straight edge I extend the lines of the drawing using a pencil. To see this in excellent detail, get a copy of the video.

Then I took off the drawing and redrew the lines. These are the rafter lines.
 You can see that I am watching the Huffman Scratchbuilding video while I'm working. This is very handy and makes modeling even more fun. I can rewind the video to catch everything that I miss.

Using some 1/8 x 1/4 styrene planks, I'll make the jig.

While Darryl talks about this, I have been doing this religiously for years. When I build a jig I often keep it forever. Therefore I do several things. One, I write on the jig with a Sharpee exactly what it is and when I made it. I then store in a plastic container or Glad Zipper Bag along with one copy of the item that it produces. That way I know exactly what it is and have one to grab and check dimensions on.

I score the plastic and then carefully put it into place. Then I put some Tenax 7R adhesive on the blocks to make them adhere. Notice my Tenax Only brush with the blue label. It is rubber banded to the bottle.

Darryl's jig requires some roofing material, so I'm using these scale 2 x 8's for the roof.

Here you can see that I positioned the plastic block to hold the cross beam. The video goes into GREAT detail on making jigs and Huffman is a master at it, so I highly recommend that you see the video and learn his technique.

The roof center board spacer is in place.

Here the jig is complete and I've started work on the jig. Unlike a magazine or other source, if you do what Darryl tells you in the video it will come out very nicely! I'm so happy! Ok, maybe that is the codeine talking. I'm highly doped up so forgive my writing. I don't do well with any kind of medicine.

I'll need eleven rafters, so I'll set up the chopper and cut all the parts out before I begin assembly. This is the beauty of a chopper...the rapid similar cuts. The razor blade is for trimming.

We have a pile of 20 rafter uprights, 10 cross members and 10 small braces for the top. Keep in mind that I already built one in order to build the jig. When I use this plan for making the logger's shacks, I'll use this jig for mass production. Making all of the rafters took all of 40 minutes after the jig was done.

Here is a rafter drying. I switched back to Elmer's glue which takes just a bit longer to set, but not much. I like the thinness of it. Notice the top cross piece.

One of the things that Darryl did was put in the bird's mouth cut. He cut his wrong in the video so I had a chance to make it right. The cut is just a small notch that helps to hold the truss in place. It works very well when you want a removable roof like I do with my detailed interior.

Here is a pile of rafters drying. Time to clean the desk. The pink box is a repair job for my daughter.

While the rafters dry I'll begin taking the walls off the glass work space. They are good and dry now.

First I cut them off the glass and clean the remaining tape off the glass, making it ready for the next use.

Then I'll remove the paper from the backing. Not sure I like doing it this way, but I tried and it is marginal. Most of the paper comes off. A few stragglers you can get with a hobby knife. The rest has to be lightly sanded off. I lost a fire block doing this. Switching to the sanding sponge (fine) did help.

The walls came out very nice. The red boards will be removed later.

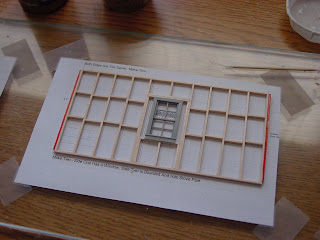
Naturally I want to test fit everything. I put up the entire building but knocked it over reaching for the camera. It is very square and the walls match front to back. All the rafters fit. Good job! It is amazingly small, yet looks so big on the video!

All that work fits in the palm of my hand and I have very small hands. These pieces will be set aside and our next job will be either building the working, real glass windows or planking the sides.
C-ya!!!

We working on rafters today. First we'll cut out the rafter diagram and make a jig like Darryl Huffman's excellent video directs us to do.


Using a long straight edge I extend the lines of the drawing using a pencil. To see this in excellent detail, get a copy of the video.

Then I took off the drawing and redrew the lines. These are the rafter lines.


Using some 1/8 x 1/4 styrene planks, I'll make the jig.

While Darryl talks about this, I have been doing this religiously for years. When I build a jig I often keep it forever. Therefore I do several things. One, I write on the jig with a Sharpee exactly what it is and when I made it. I then store in a plastic container or Glad Zipper Bag along with one copy of the item that it produces. That way I know exactly what it is and have one to grab and check dimensions on.

I score the plastic and then carefully put it into place. Then I put some Tenax 7R adhesive on the blocks to make them adhere. Notice my Tenax Only brush with the blue label. It is rubber banded to the bottle.

Darryl's jig requires some roofing material, so I'm using these scale 2 x 8's for the roof.

Here you can see that I positioned the plastic block to hold the cross beam. The video goes into GREAT detail on making jigs and Huffman is a master at it, so I highly recommend that you see the video and learn his technique.

The roof center board spacer is in place.
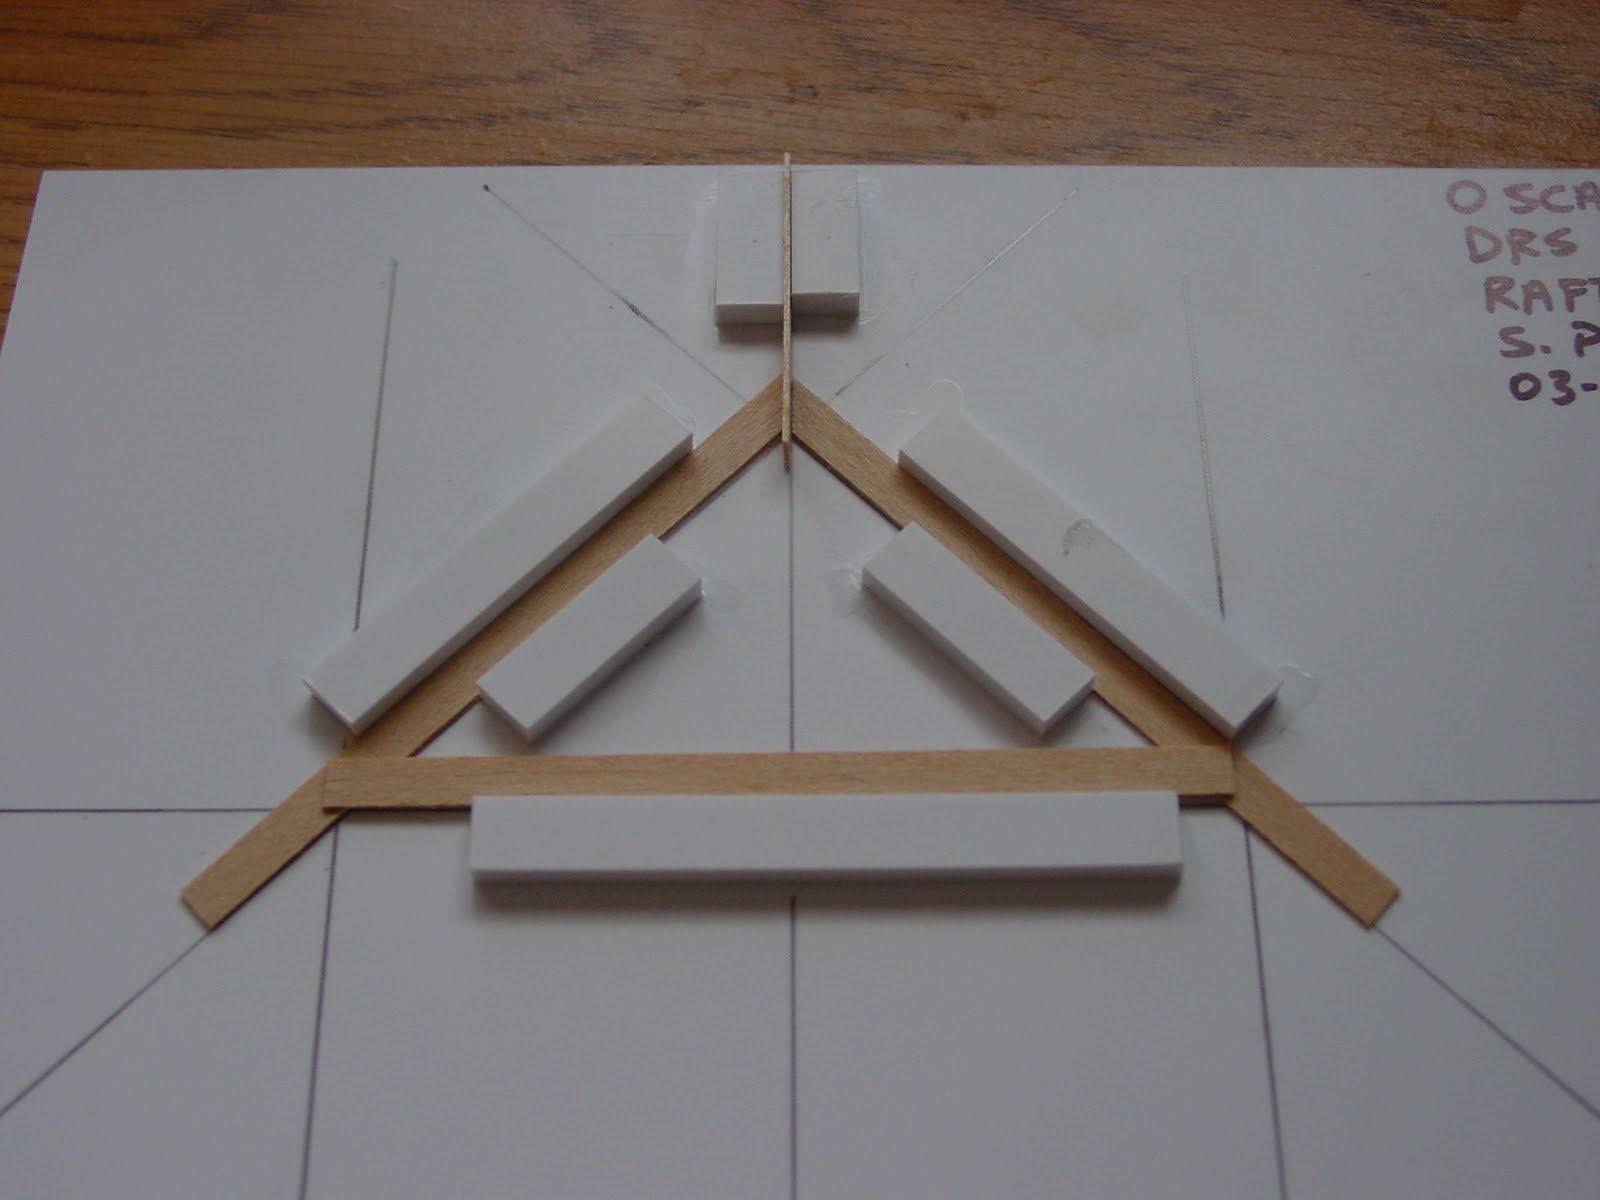
Here the jig is complete and I've started work on the jig. Unlike a magazine or other source, if you do what Darryl tells you in the video it will come out very nicely! I'm so happy! Ok, maybe that is the codeine talking. I'm highly doped up so forgive my writing. I don't do well with any kind of medicine.

I'll need eleven rafters, so I'll set up the chopper and cut all the parts out before I begin assembly. This is the beauty of a chopper...the rapid similar cuts. The razor blade is for trimming.

We have a pile of 20 rafter uprights, 10 cross members and 10 small braces for the top. Keep in mind that I already built one in order to build the jig. When I use this plan for making the logger's shacks, I'll use this jig for mass production. Making all of the rafters took all of 40 minutes after the jig was done.

Here is a rafter drying. I switched back to Elmer's glue which takes just a bit longer to set, but not much. I like the thinness of it. Notice the top cross piece.

One of the things that Darryl did was put in the bird's mouth cut. He cut his wrong in the video so I had a chance to make it right. The cut is just a small notch that helps to hold the truss in place. It works very well when you want a removable roof like I do with my detailed interior.

Here is a pile of rafters drying. Time to clean the desk. The pink box is a repair job for my daughter.

While the rafters dry I'll begin taking the walls off the glass work space. They are good and dry now.

First I cut them off the glass and clean the remaining tape off the glass, making it ready for the next use.

Then I'll remove the paper from the backing. Not sure I like doing it this way, but I tried and it is marginal. Most of the paper comes off. A few stragglers you can get with a hobby knife. The rest has to be lightly sanded off. I lost a fire block doing this. Switching to the sanding sponge (fine) did help.

The walls came out very nice. The red boards will be removed later.

Naturally I want to test fit everything. I put up the entire building but knocked it over reaching for the camera. It is very square and the walls match front to back. All the rafters fit. Good job! It is amazingly small, yet looks so big on the video!

All that work fits in the palm of my hand and I have very small hands. These pieces will be set aside and our next job will be either building the working, real glass windows or planking the sides.
C-ya!!!
Wednesday, March 24, 2010
#010 01 Dr. Bank's Office - Building Walls - The Sequel
Greetings! (cough, cough). I'm sick as a dog and staying home again trying to get well. Bronchitis is brutal. I've been sick for over a week and decided I just need to be down 100%. So, I'm sitting here at the computer desk taking cold medicine and working on my structure. It is about all I can do. The medicine is making my vision go bad and I have intermittent coughing fits. But look what I got done!
For those of you that are reading for the first time...I've already done all of this. It was destroyed in a silicone casting accident, and I'm getting a do-over. Luckily it was just cheap stripwood and all I really lost was time. In 3.5 hours I have it all rebuilt and at a better quality level than before.
 I have a long glass work surface and I cut out each of the drawings and taped them on. Its nice outside so I've opened the window. Start time is 11:30 am.
 There are five sections: right and left walls, front and back walls and a front sign board.
 Using scale 2x4 lumber, we'll start on one of the long walls. On my computer the Neil Boortz show is blasting Obamacare.
 I took this photo to remind me to replenish my stock of 2x4's next time I'm at the hobby shop.
 The next step is to cut the vertical studs. There are several dozen of these so I set up the Chopper II and mass produce them. Looks like the blade is starting to break the boards instead of cutting them.
 The Chopper makes quick work of the studs.
 Yup, the boards are breaking and are fuzzy on the ends. How are you fixed for blades?

Here are the studs. I'll put them in a plastic tray that is meant for cut lumber (and not raw lumbers which is kept elsewhere). I don't want to chop these up accidentally.
 The blade is mounted under the handle by a small Phillips head screw. I just so happen to have a screwdriver here at the computer desk.
 The new blade is swapped out quickly. It had already been turned once, so time for a new one.

Next I'll cut out about 30 fire blocks using the same format.
 Nearby I keep a little metal condiment cup for storing scrap pieces. NOTHING is wasted here!!! I'll use these for something.
 The cut fire boards are put into this little cup.
 I'm switching to Aleen's Tacky Glue for construction. My friends swear by it, but I'm not that enthused yet. It is much thicker than Elmer's and appears to bond quicker. So I'll give it a try. The little paper souffle cup came from Captain D's, A Great Little Seafood Place. They are free as long as no one is looking. I always leave a big tip. They are for ketchup, mostly. I just put glue and paint in them.
 We'll start by cutting the base and top plates out of 2x4 stock.
 Then we'll put in the studs and the fireblocks, per the diagram. Want to build your own? The drawings can be found on the blog.
 Here is side one already framed out. I decided that instead of using the same windows on both sides that I would use a smaller window on this side to give the office some space for a desk.
 I marked this window to be the larger one.
 Next, on the first wall I built I wanted to add some extra length boards so that I put the right length of siding on the building. These are temporary and I don't want to glue anything to them, so I just mark them with a red Sharpee pen.
 You can now see the red extra boards on either side where the clapboard will be a little bit longer than the wall.
 The tacky glue is very tacky and everytime I pick up some glue I pick up the souffle cup. So I started putting it back on the glass again. I like to try new things, but when they don't work I will not hesitate to go back to the old stand by.
 Here is side 2 with the larger window. I'm using Grandt Line Castings as placeholders, but I will in all likelihood scratch build the windows. In the deep South they would be wide open with curtains blowing in and out.
 Now I've added red boards to this side as well.
 Here I've finished the back door assembly.

Here is the front door assembly with its small window.

Here are the four wall panels which will dry overnight.

The last item is the masthead for the front. It looks easy but the 45 degree cuts took me a which to do.
All of this will dry and maybe tonight I'll start working on it some more. Next steps will be the siding, which I've already painted and is sitting downstairs.
For those of you that are reading for the first time...I've already done all of this. It was destroyed in a silicone casting accident, and I'm getting a do-over. Luckily it was just cheap stripwood and all I really lost was time. In 3.5 hours I have it all rebuilt and at a better quality level than before.


Here are the studs. I'll put them in a plastic tray that is meant for cut lumber (and not raw lumbers which is kept elsewhere). I don't want to chop these up accidentally.


Next I'll cut out about 30 fire blocks using the same format.


Here is the front door assembly with its small window.

Here are the four wall panels which will dry overnight.

The last item is the masthead for the front. It looks easy but the 45 degree cuts took me a which to do.
All of this will dry and maybe tonight I'll start working on it some more. Next steps will be the siding, which I've already painted and is sitting downstairs.
Subscribe to:
Posts (Atom)

