
We working on rafters today. First we'll cut out the rafter diagram and make a jig like Darryl Huffman's excellent video directs us to do.


Using a long straight edge I extend the lines of the drawing using a pencil. To see this in excellent detail, get a copy of the video.

Then I took off the drawing and redrew the lines. These are the rafter lines.


Using some 1/8 x 1/4 styrene planks, I'll make the jig.

While Darryl talks about this, I have been doing this religiously for years. When I build a jig I often keep it forever. Therefore I do several things. One, I write on the jig with a Sharpee exactly what it is and when I made it. I then store in a plastic container or Glad Zipper Bag along with one copy of the item that it produces. That way I know exactly what it is and have one to grab and check dimensions on.

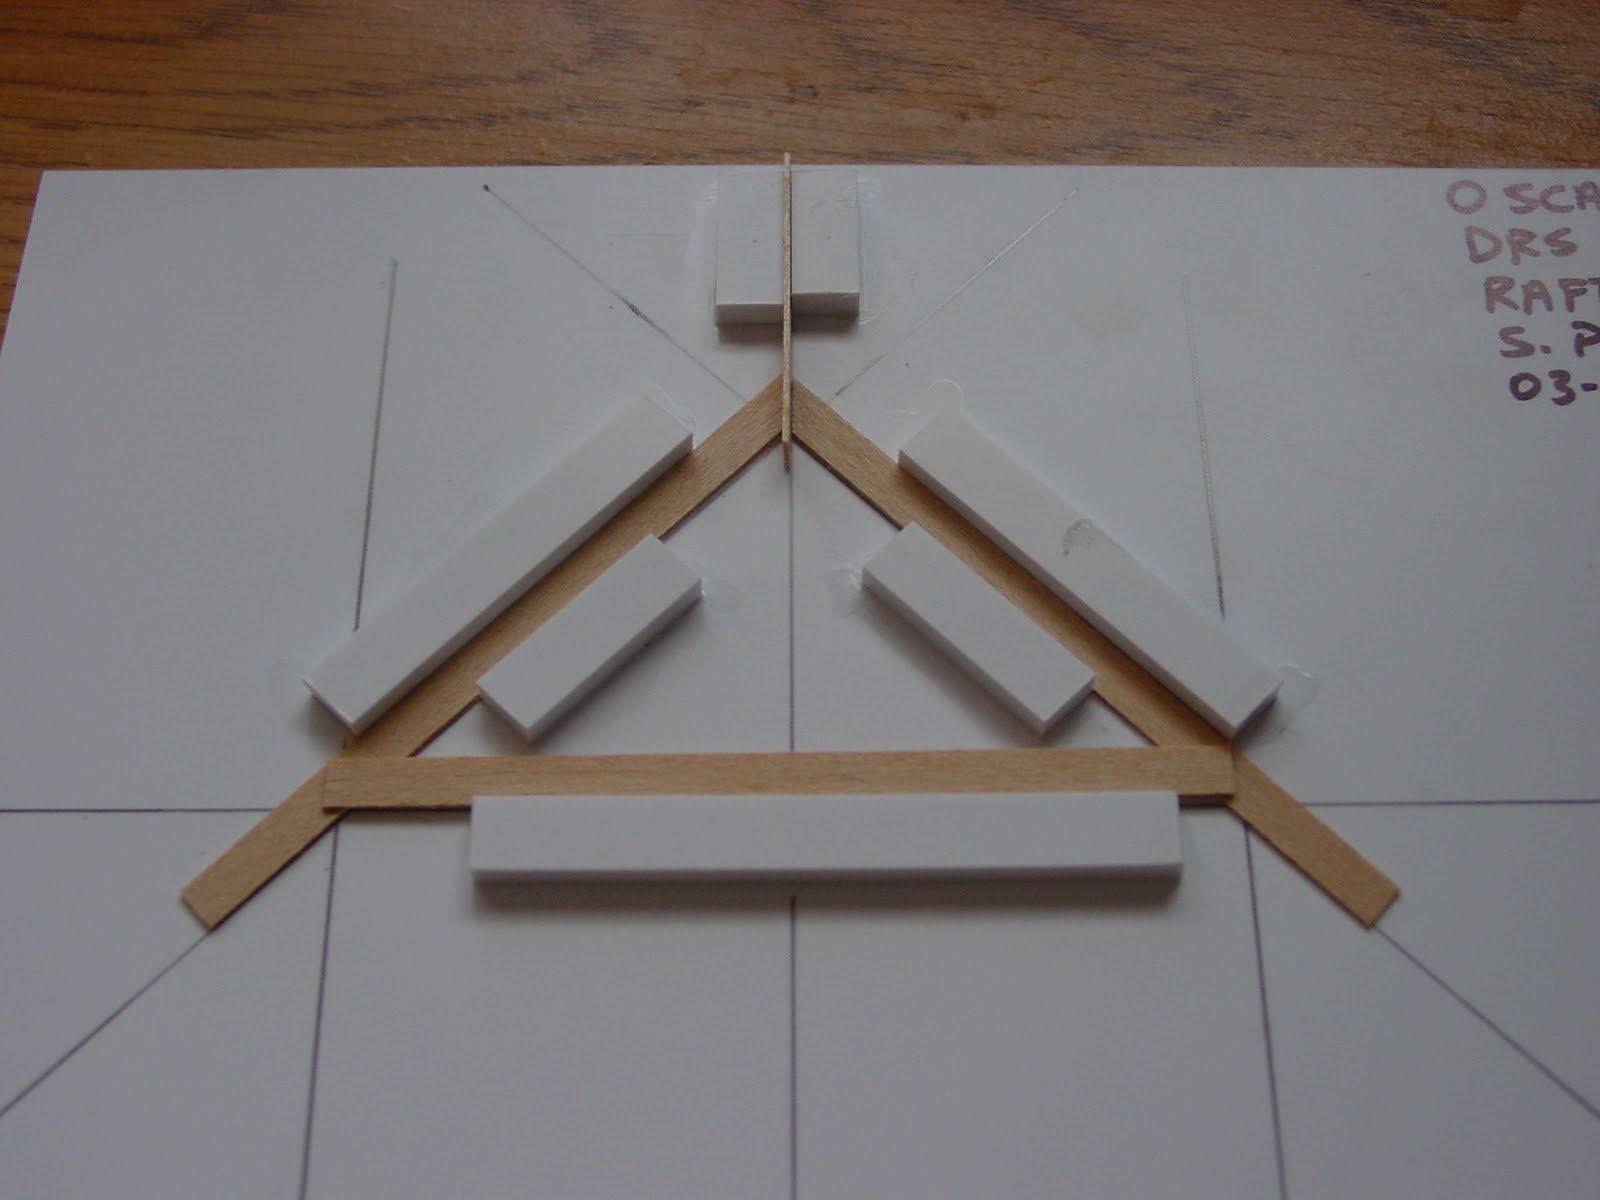
I score the plastic and then carefully put it into place. Then I put some Tenax 7R adhesive on the blocks to make them adhere. Notice my Tenax Only brush with the blue label. It is rubber banded to the bottle.

Darryl's jig requires some roofing material, so I'm using these scale 2 x 8's for the roof.

Here you can see that I positioned the plastic block to hold the cross beam. The video goes into GREAT detail on making jigs and Huffman is a master at it, so I highly recommend that you see the video and learn his technique.

The roof center board spacer is in place.
Here the jig is complete and I've started work on the jig. Unlike a magazine or other source, if you do what Darryl tells you in the video it will come out very nicely! I'm so happy! Ok, maybe that is the codeine talking. I'm highly doped up so forgive my writing. I don't do well with any kind of medicine.

I'll need eleven rafters, so I'll set up the chopper and cut all the parts out before I begin assembly. This is the beauty of a chopper...the rapid similar cuts. The razor blade is for trimming.

We have a pile of 20 rafter uprights, 10 cross members and 10 small braces for the top. Keep in mind that I already built one in order to build the jig. When I use this plan for making the logger's shacks, I'll use this jig for mass production. Making all of the rafters took all of 40 minutes after the jig was done.

Here is a rafter drying. I switched back to Elmer's glue which takes just a bit longer to set, but not much. I like the thinness of it. Notice the top cross piece.

One of the things that Darryl did was put in the bird's mouth cut. He cut his wrong in the video so I had a chance to make it right. The cut is just a small notch that helps to hold the truss in place. It works very well when you want a removable roof like I do with my detailed interior.

Here is a pile of rafters drying. Time to clean the desk. The pink box is a repair job for my daughter.

While the rafters dry I'll begin taking the walls off the glass work space. They are good and dry now.

First I cut them off the glass and clean the remaining tape off the glass, making it ready for the next use.

Then I'll remove the paper from the backing. Not sure I like doing it this way, but I tried and it is marginal. Most of the paper comes off. A few stragglers you can get with a hobby knife. The rest has to be lightly sanded off. I lost a fire block doing this. Switching to the sanding sponge (fine) did help.

The walls came out very nice. The red boards will be removed later.

Naturally I want to test fit everything. I put up the entire building but knocked it over reaching for the camera. It is very square and the walls match front to back. All the rafters fit. Good job! It is amazingly small, yet looks so big on the video!

All that work fits in the palm of my hand and I have very small hands. These pieces will be set aside and our next job will be either building the working, real glass windows or planking the sides.
C-ya!!!


Scott, Check the web page www.ngineering.com for microscope cover glass for your windows. Nothing looks quite like glass like glass does. That stuff is pretty thin, so you have to be good with a glass cutter. I like what you're doing with this Doctor's office. Walt
ReplyDelete